Official Documentation
A step-by-step guide to deploying ExodSync in your Microsoft 365 environment.
Prerequisites
For a smooth and uninterrupted configuration, ensure you have the following three elements before starting.
1. ExodSync Tool
Install and extract the application on the computers that will be used daily for synchronization.
2. Admin Access
You must have the credentials of an account with the "Global Administrator" role on the organization's Microsoft Entra ID tenant.
3. Test File (CSV)
Prepare a CSV export generated according to your needs from your management software to perform your first simulation safely.
Advanced Security & Zero False Positives
Windows: The ExodSync application is compiled using a custom MSVC bootloader and injected with cryptographic metadata. It is designed to run seamlessly on your workstation without triggering Microsoft Defender SmartScreen alerts.
Microsoft Entra ID Configuration Guide
Step 1: App Registration
For ExodSync to synchronize your directories, it must be registered as a secure third-party application with Microsoft Entra ID.
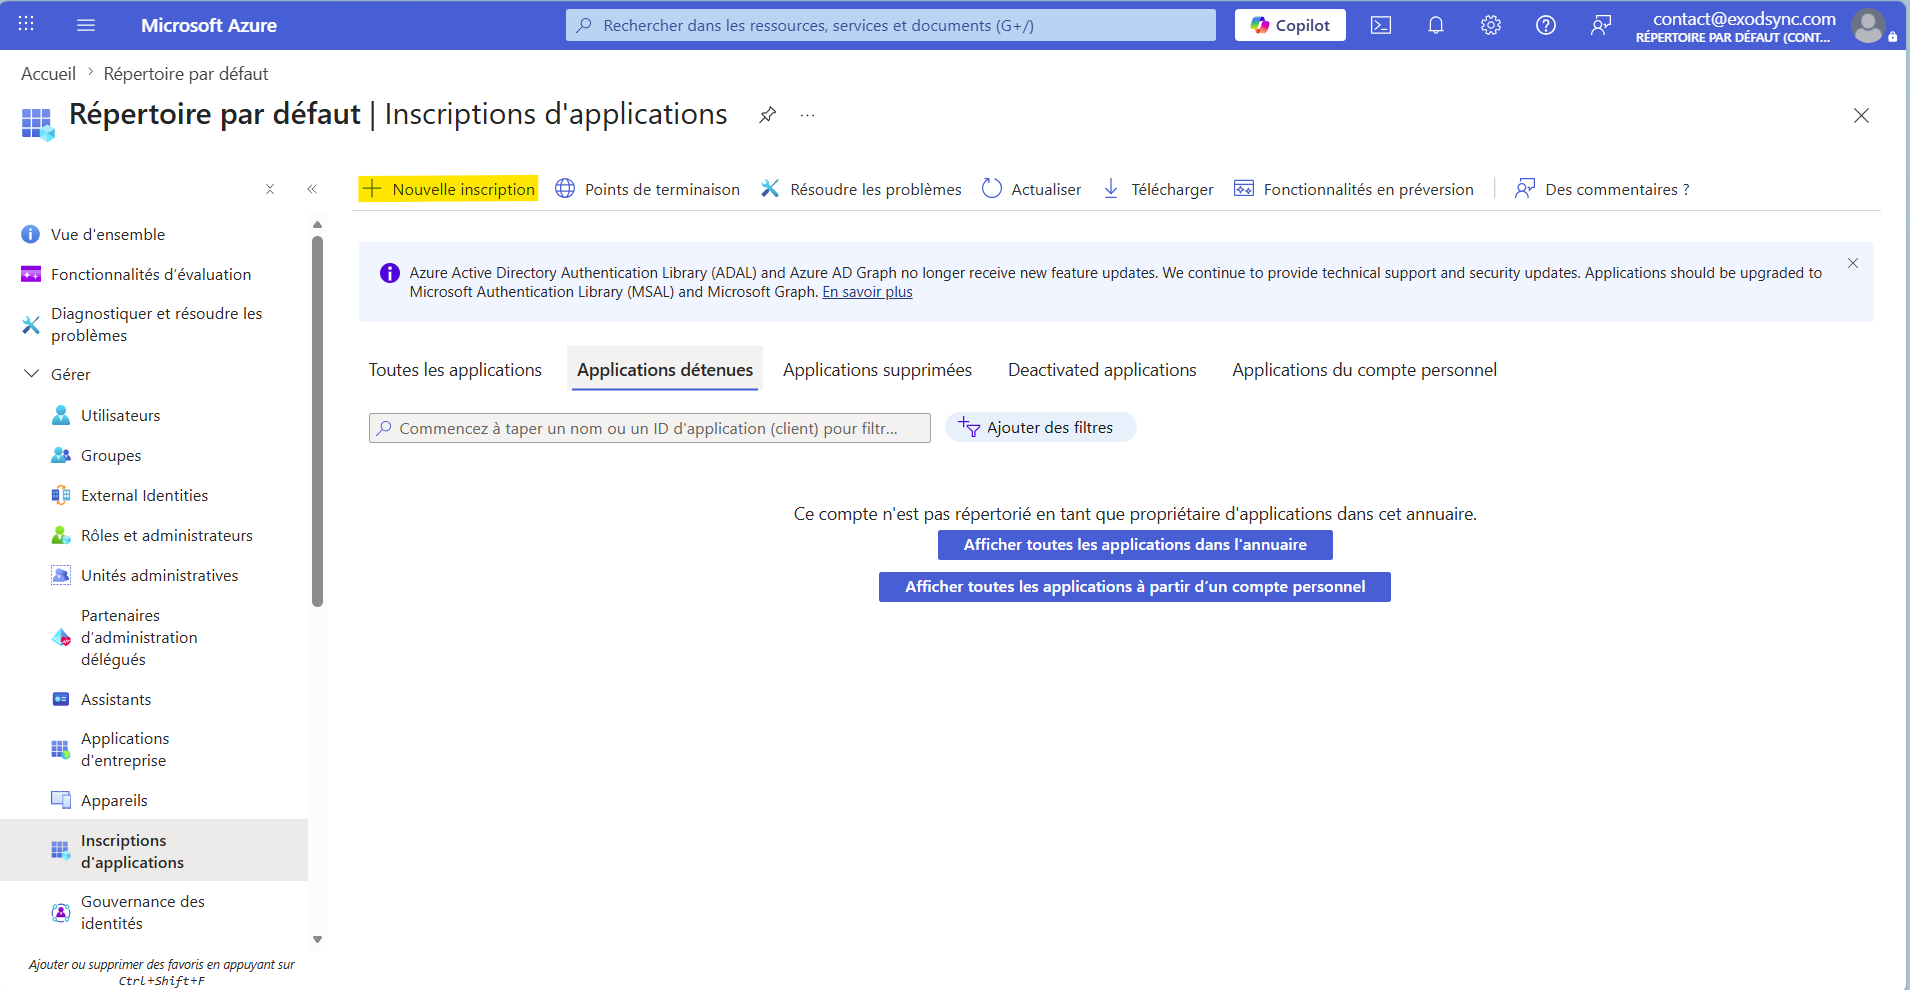
From the App registrations menu, click on New registration and fill out the form:
- Name: Enter "ExodSync".
- Supported account types: Leave the default option (Single tenant).
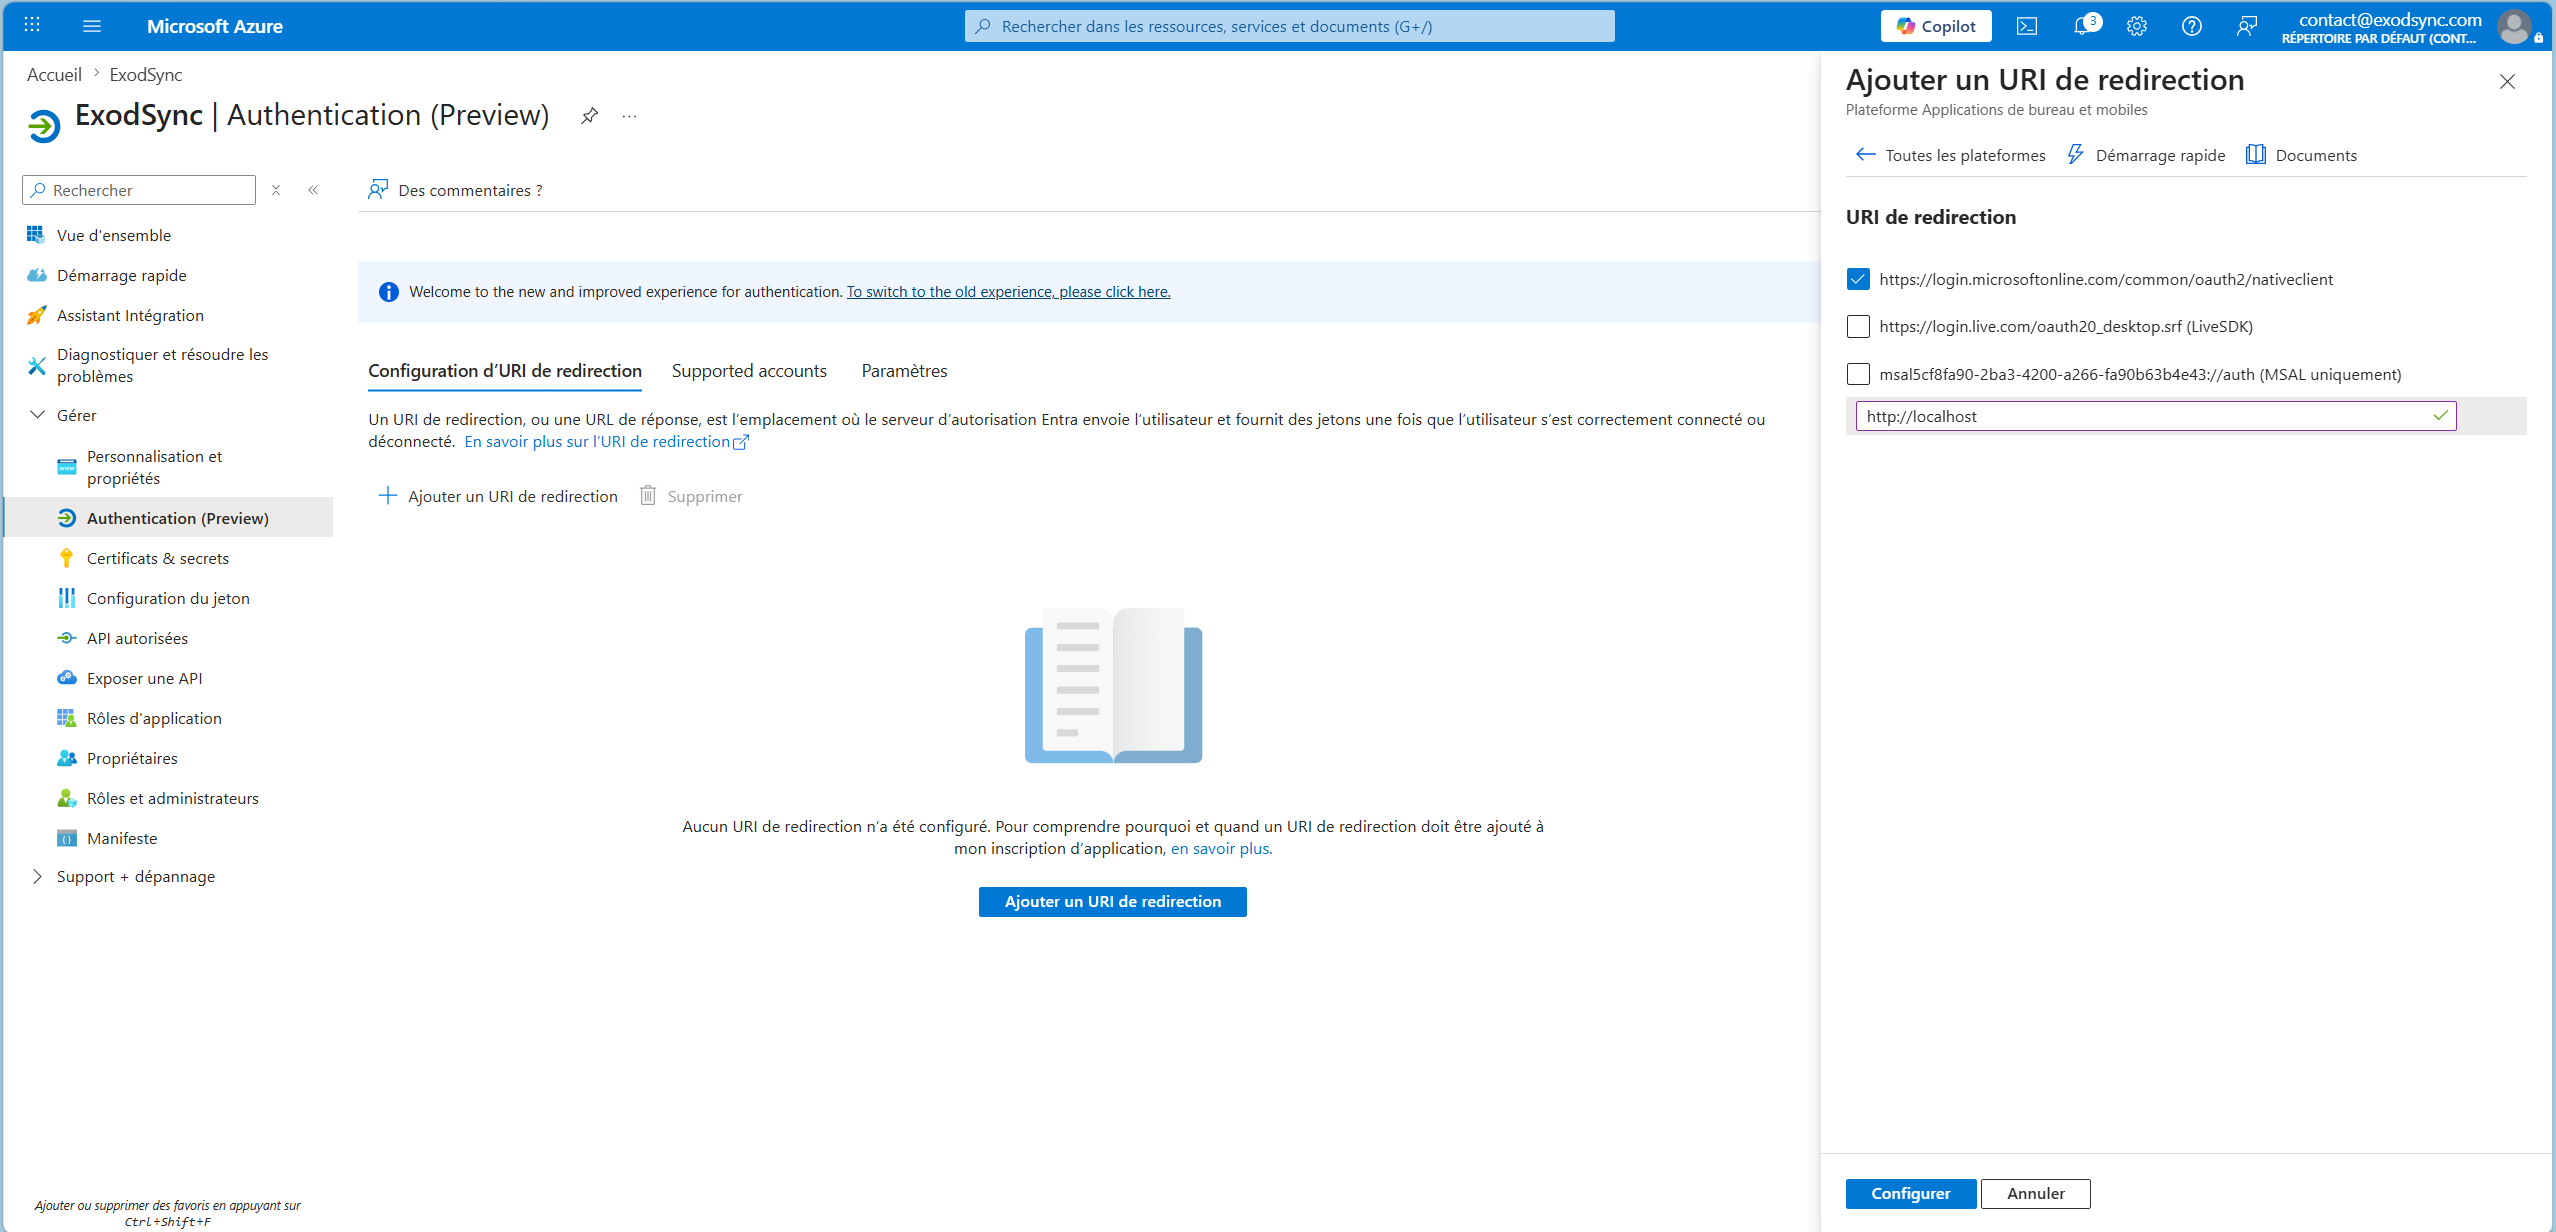
- Redirect URI: Choose "Public client/native (mobile & desktop)". In the text field next to it, type exactly:
http://localhost Copied ! ✅
Step 2: Link ExodSync to Entra ID
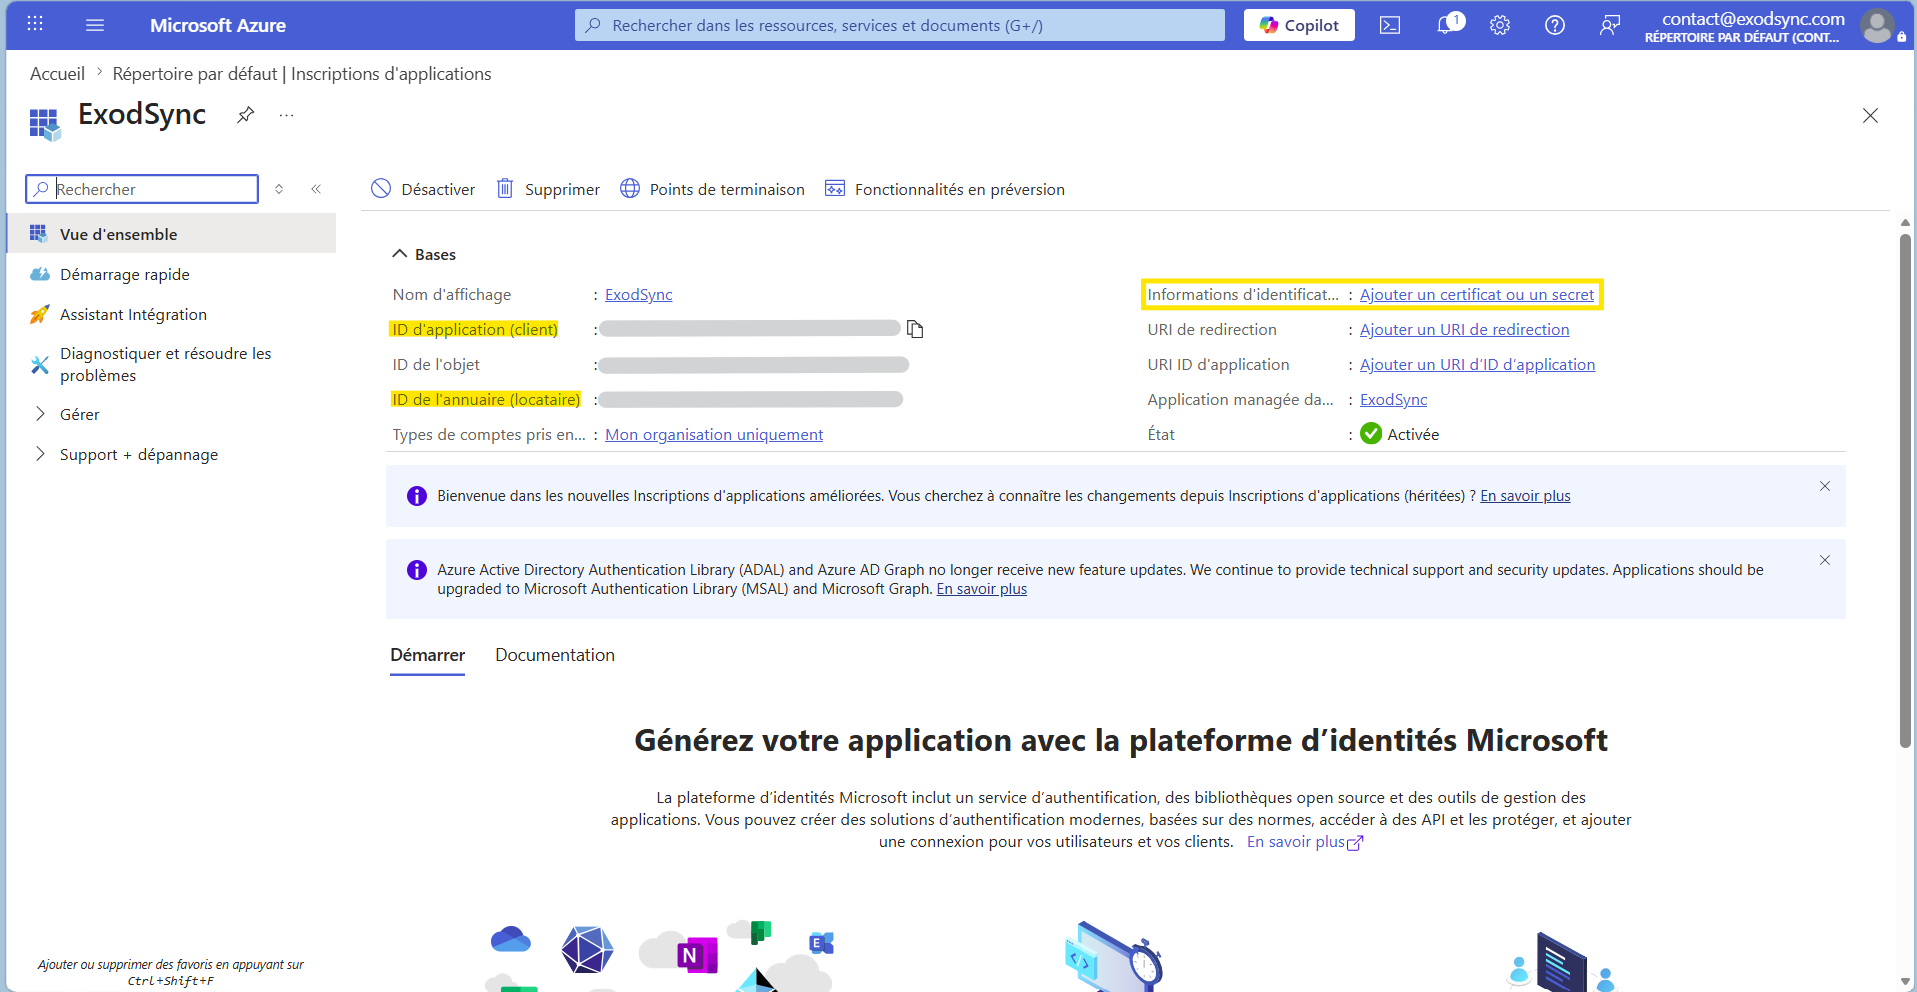
These two identifiers form the unique authentication link between your organization and the tool. Copy them to paste into ExodSync's settings during its first use.
- Application (Client) ID: Unique identifier of the ExodSync application.
- Directory (Tenant) ID: Global identifier of your organization.
- Client Secret (optional): Provides autonomy to delegate password management.
Sensitive Information
Never share your Tenant ID or Client Secret publicly. They are the keys to your directory.
ExodSync Configuration Guide
Step 1: The Settings Sidebar
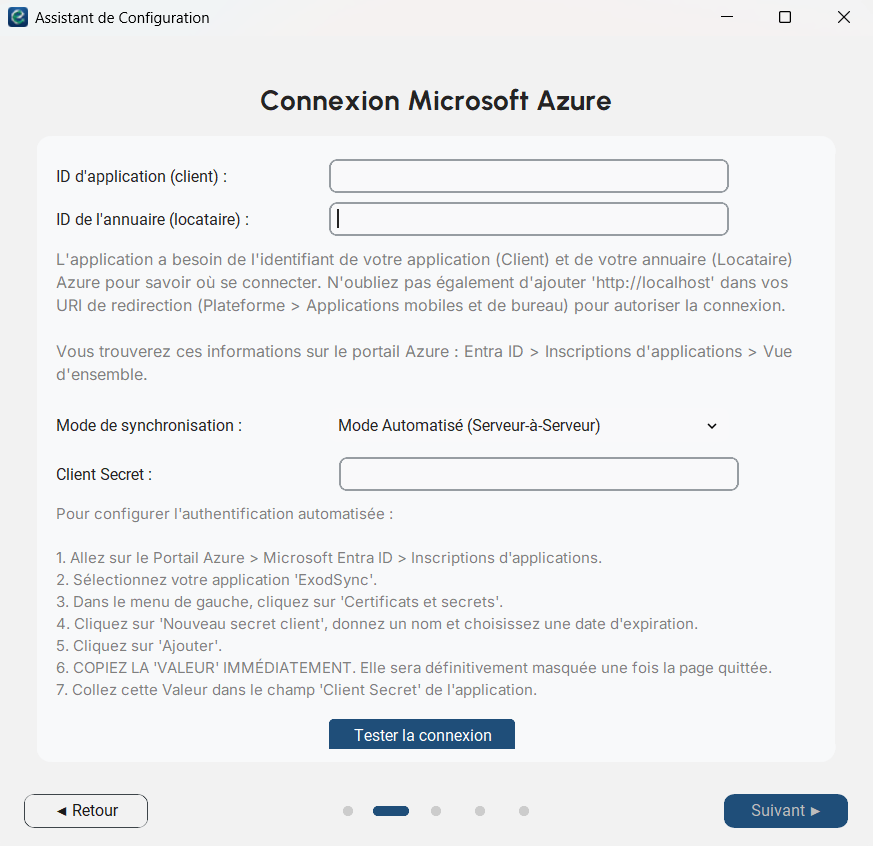
ExodSync uses a modern Single-Window (Monowindow) architecture. Click the Settings icon in the left menu to open the configuration blade:
- Credentials: Insert the Client ID and Tenant ID you retrieved earlier.
- Connection Mode:
- Delegated: Uses the active user's interactive login.
- Automated: Requires a Client Secret (ideal for background operation). - Validation: The test button instantly validates communication with the Microsoft Graph API.
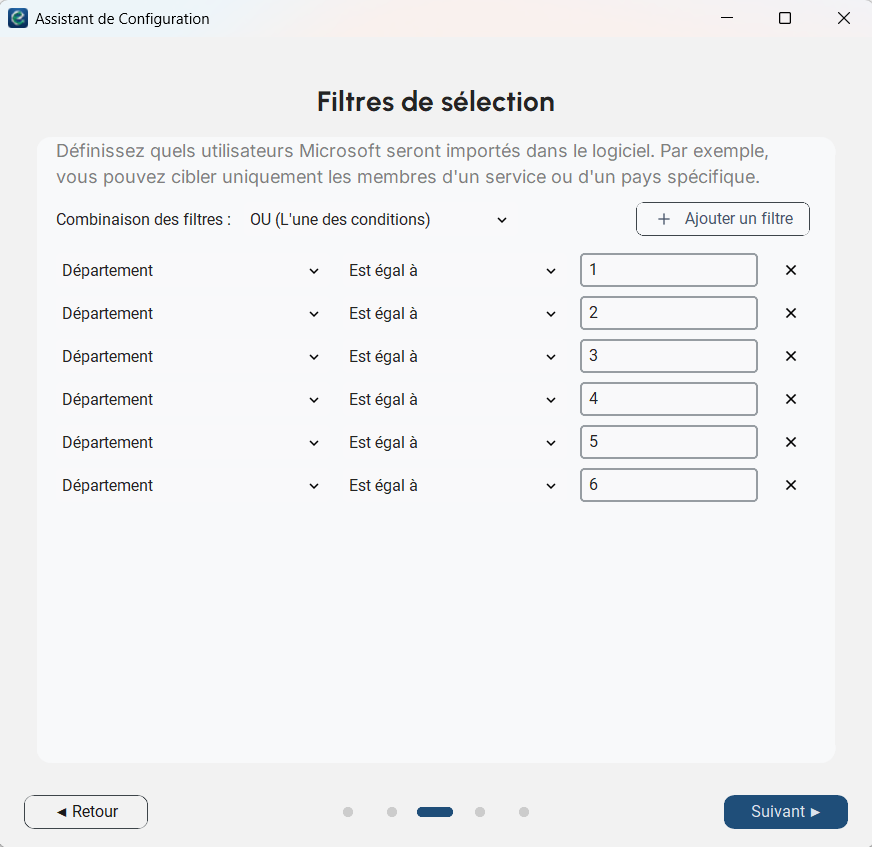
Step 2: Target Microsoft Accounts
Precisely define the scope of users to compare for a mirror synchronization without impacting the rest of your directory.
- Custom Criteria: Use attributes (Department, Name...) to isolate your groups.
- Flexible Logic: Easily combine your inclusion and exclusion filters (AND/OR).
Understanding OData Filters (Advanced Mode)
The ExodSync interface allows you to filter accounts in two completely independent ways:
- Visual Builder: A simple and intuitive interface with dropdown menus.
- Advanced Mode (OData Syntax): A free text area to write complex Microsoft Graph queries.
Independent Modes
These two modes do not automatically translate to each other. Only the mode currently displayed on screen will be used during synchronization. If you leave the tab on "Advanced Mode", your raw query will be sent to Microsoft, ignoring the Visual Builder configuration.
Strict Graph API Rules (Advanced Mode)
If you use Advanced Mode, Microsoft's OData syntax is unforgiving:
- Case Sensitivity: Properties are often written in camelCase (e.g.
accountEnabled, notaccountenabled). - Single Quotes: String values must strictly be enclosed in single quotes (e.g.
'Student'), not double quotes.
Tip: Always use the "Test filter (Preview)" button to validate your syntax before running a synchronization!
OData Query Examples for Education
| Use Case in Schools | Visual Operator (Equivalent) | OData Query (Advanced Mode) |
|---|---|---|
| Target students in a specific program | AND combination | jobTitle eq 'Student' and department eq 'Technical' |
| Target a list of classes | Is in | department in ('1A', '1B', '2A') |
| Exclude disabled accounts | (AND combination filter) | accountEnabled eq true and department eq 'Teachers' |
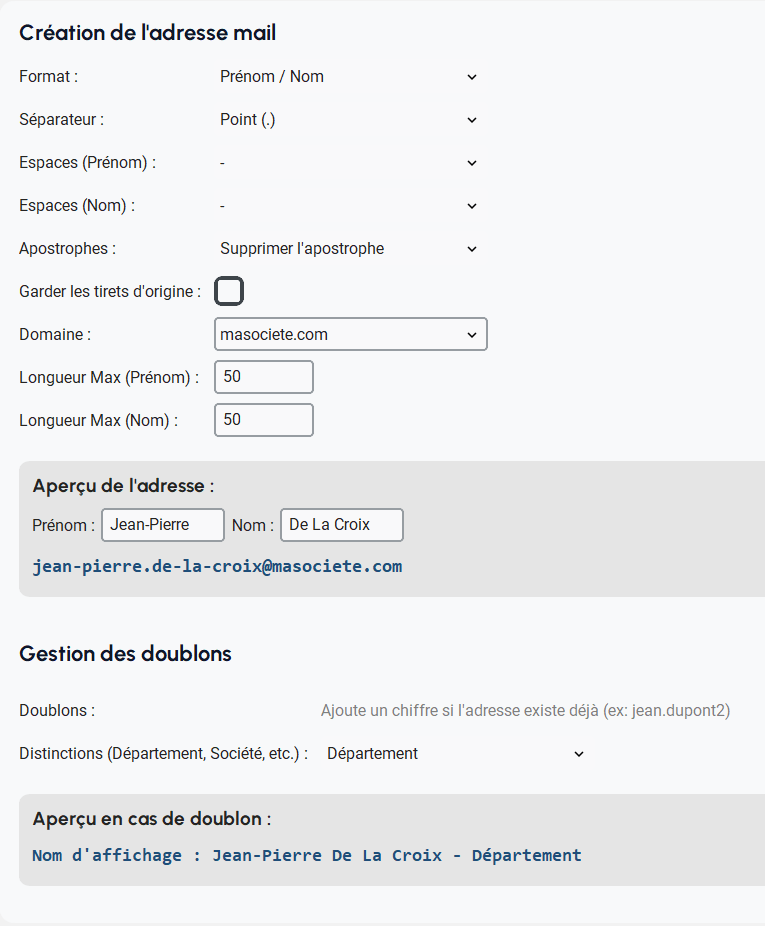
Step 3: Email Generator
Automate email address creation according to your naming standards.
- Standardization: Define strict rules (first/last name order, separators).
- Preview: Instantly check the impact of your settings.
- Smart Handling: Automated handling of duplicates and namesakes (adding a number or department).
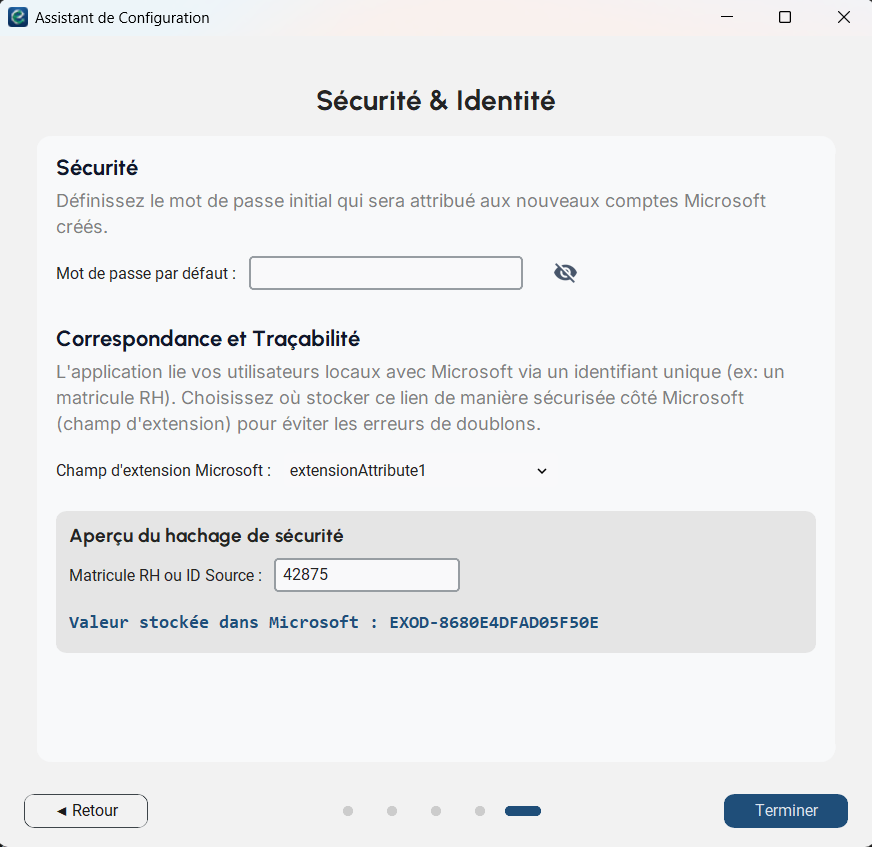
Step 4: Security & Traceability
Ensure the integrity of your directory with centralized access management.
- Initialization: Set the default password.
- Traceability: Link users via a unique identifier (e.g., employee ID).
- GDPR Compliance: Your source identifiers are hashed locally before transmission.
Daily Usage & Synchronization
Welcome to ExodSync
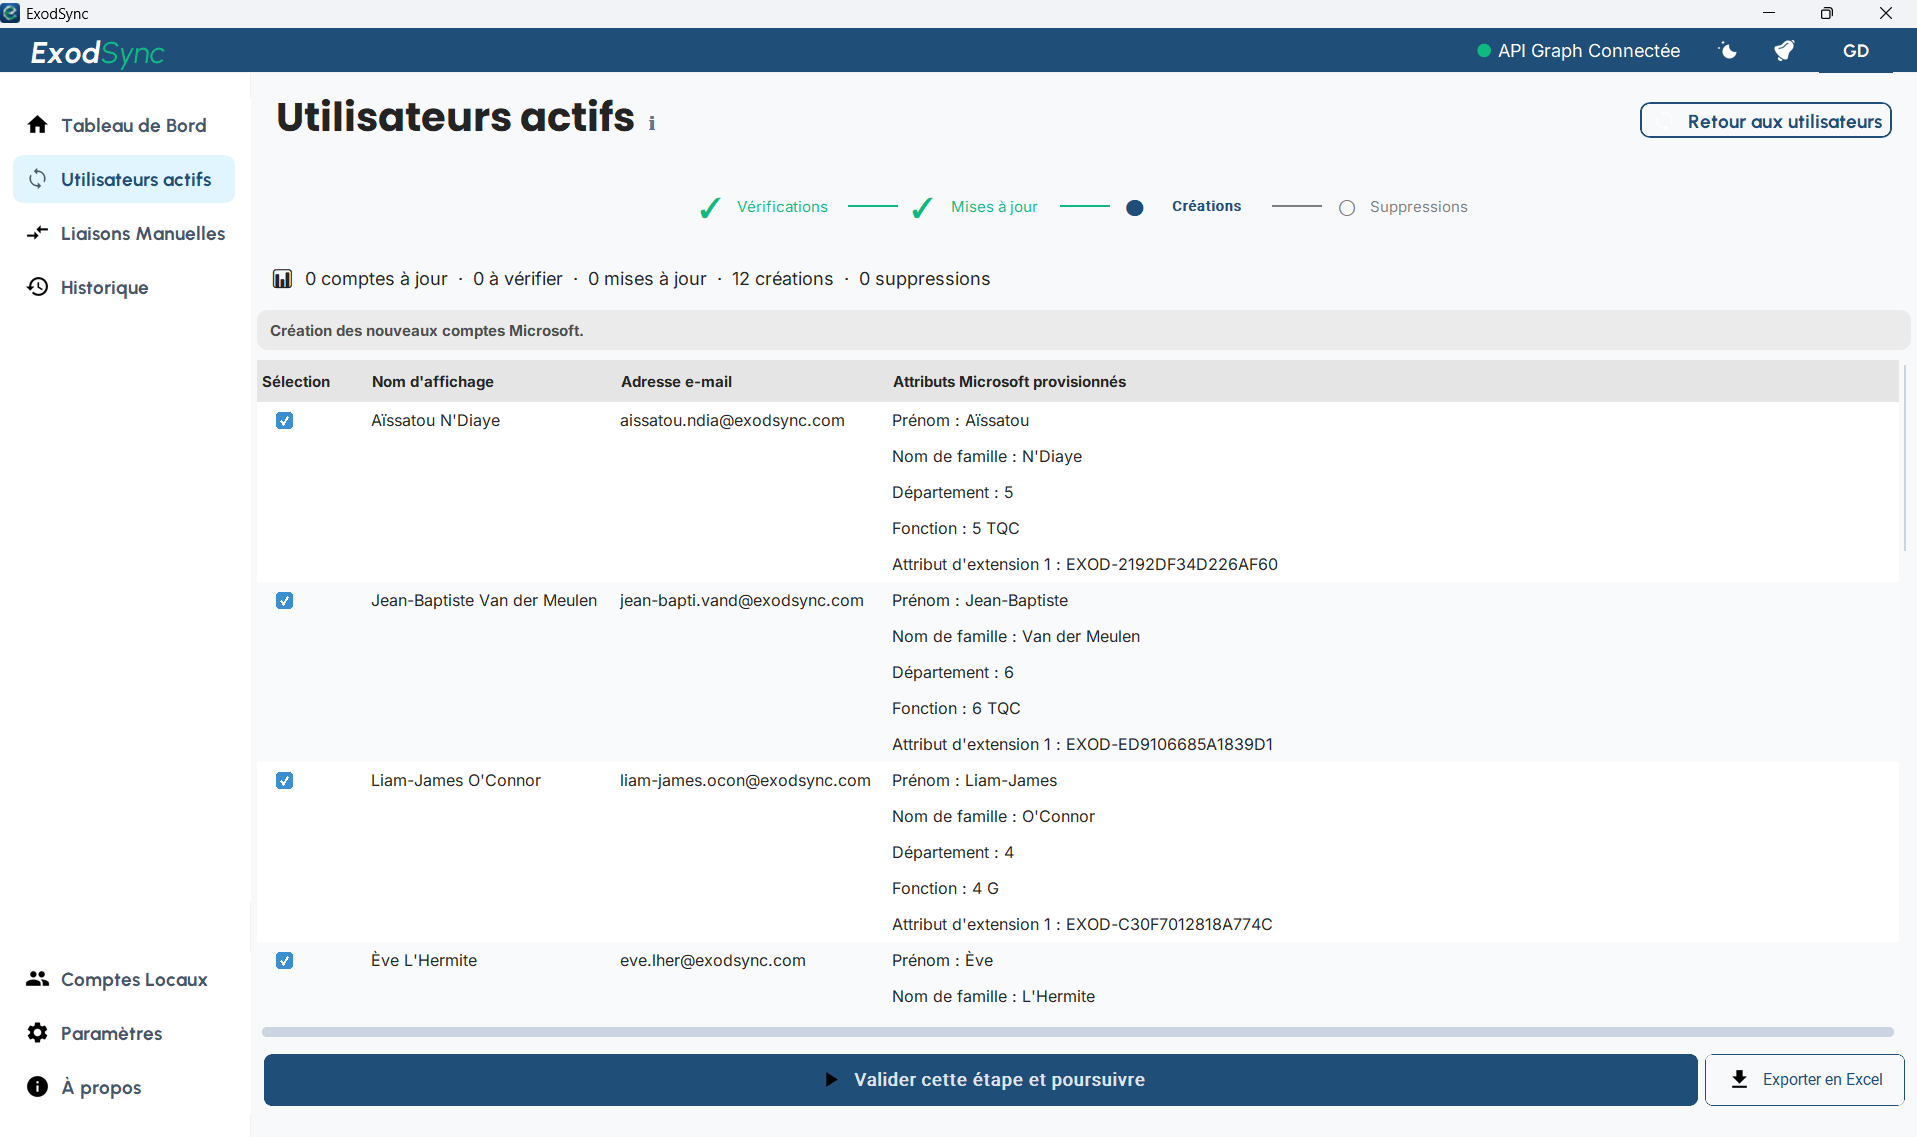
Simply import your latest CSV export to instantly visualize your directory's state. With one click, launch the smart analysis to compare local data and prepare your mirror synchronization.
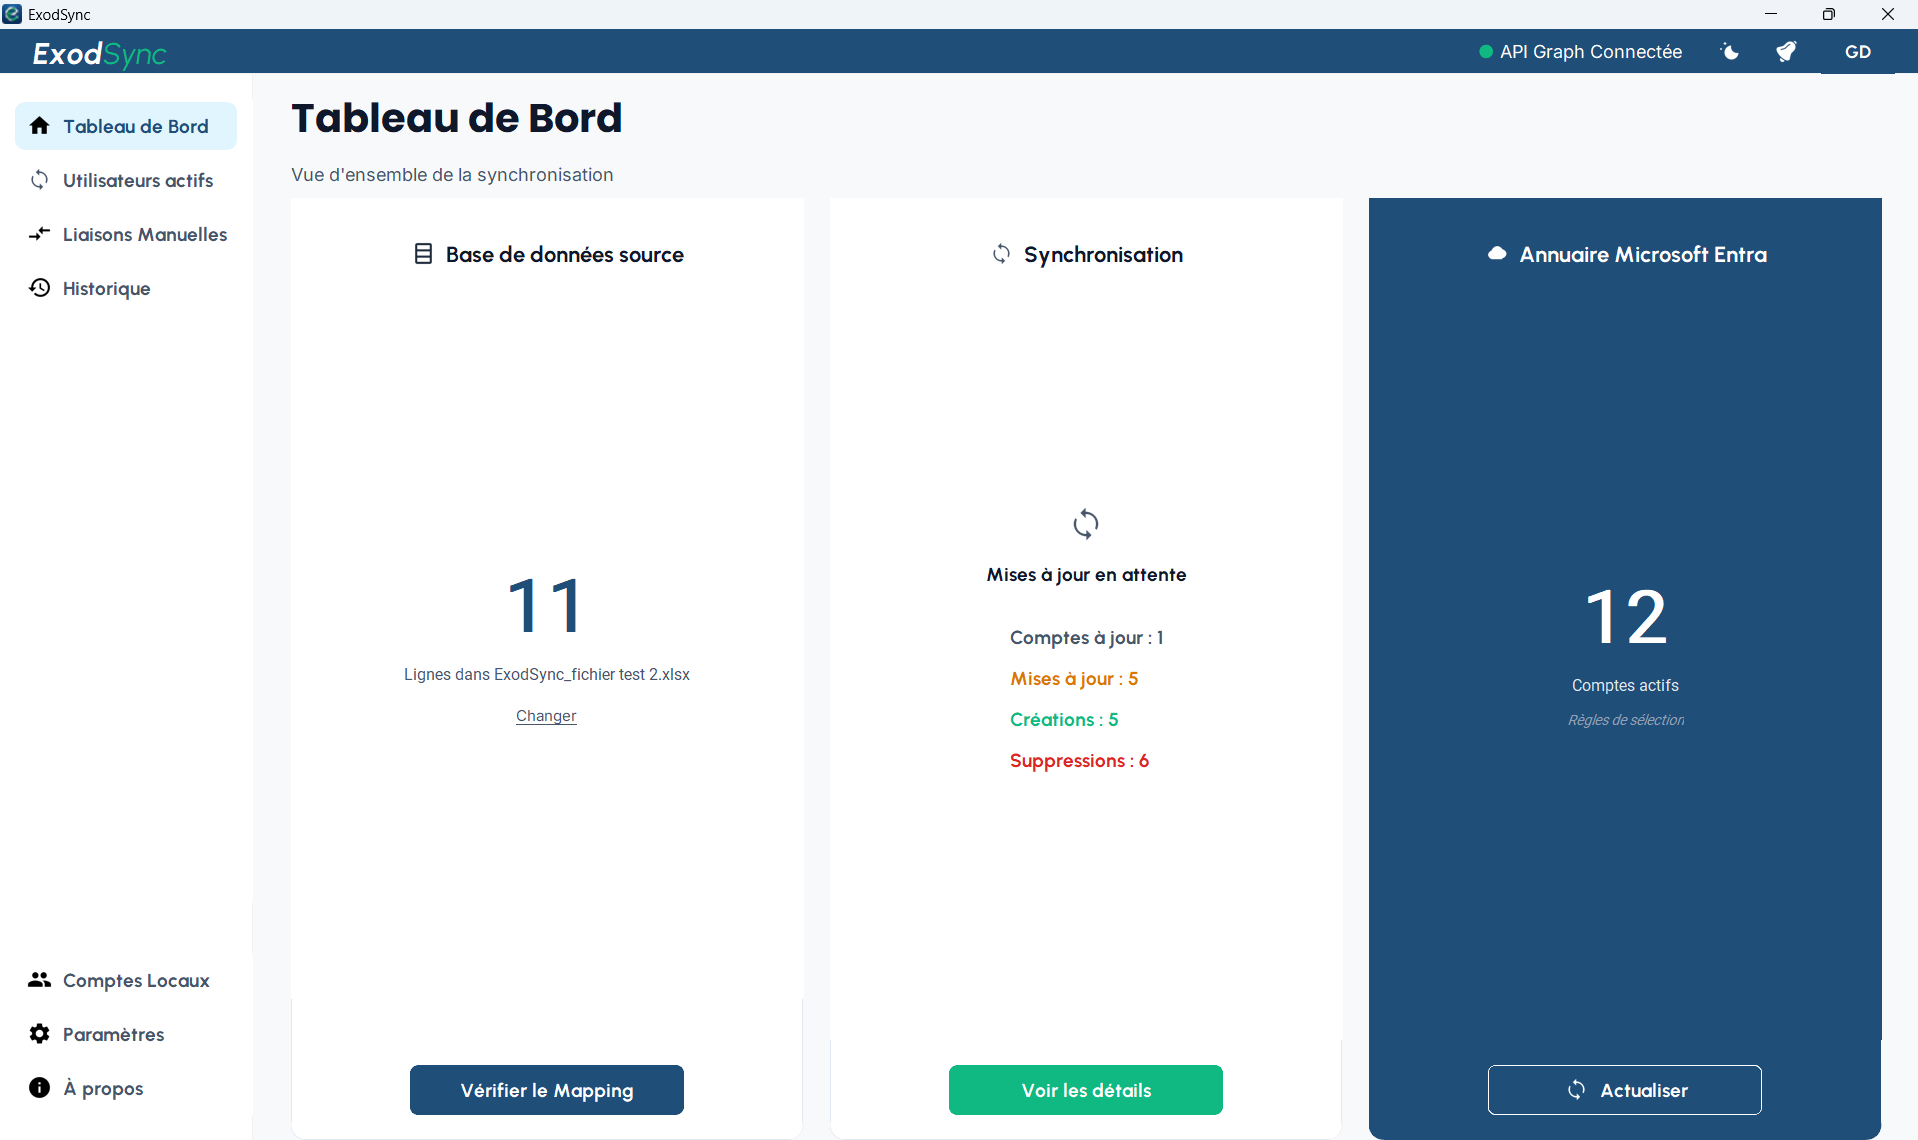
Mirror Synchronization
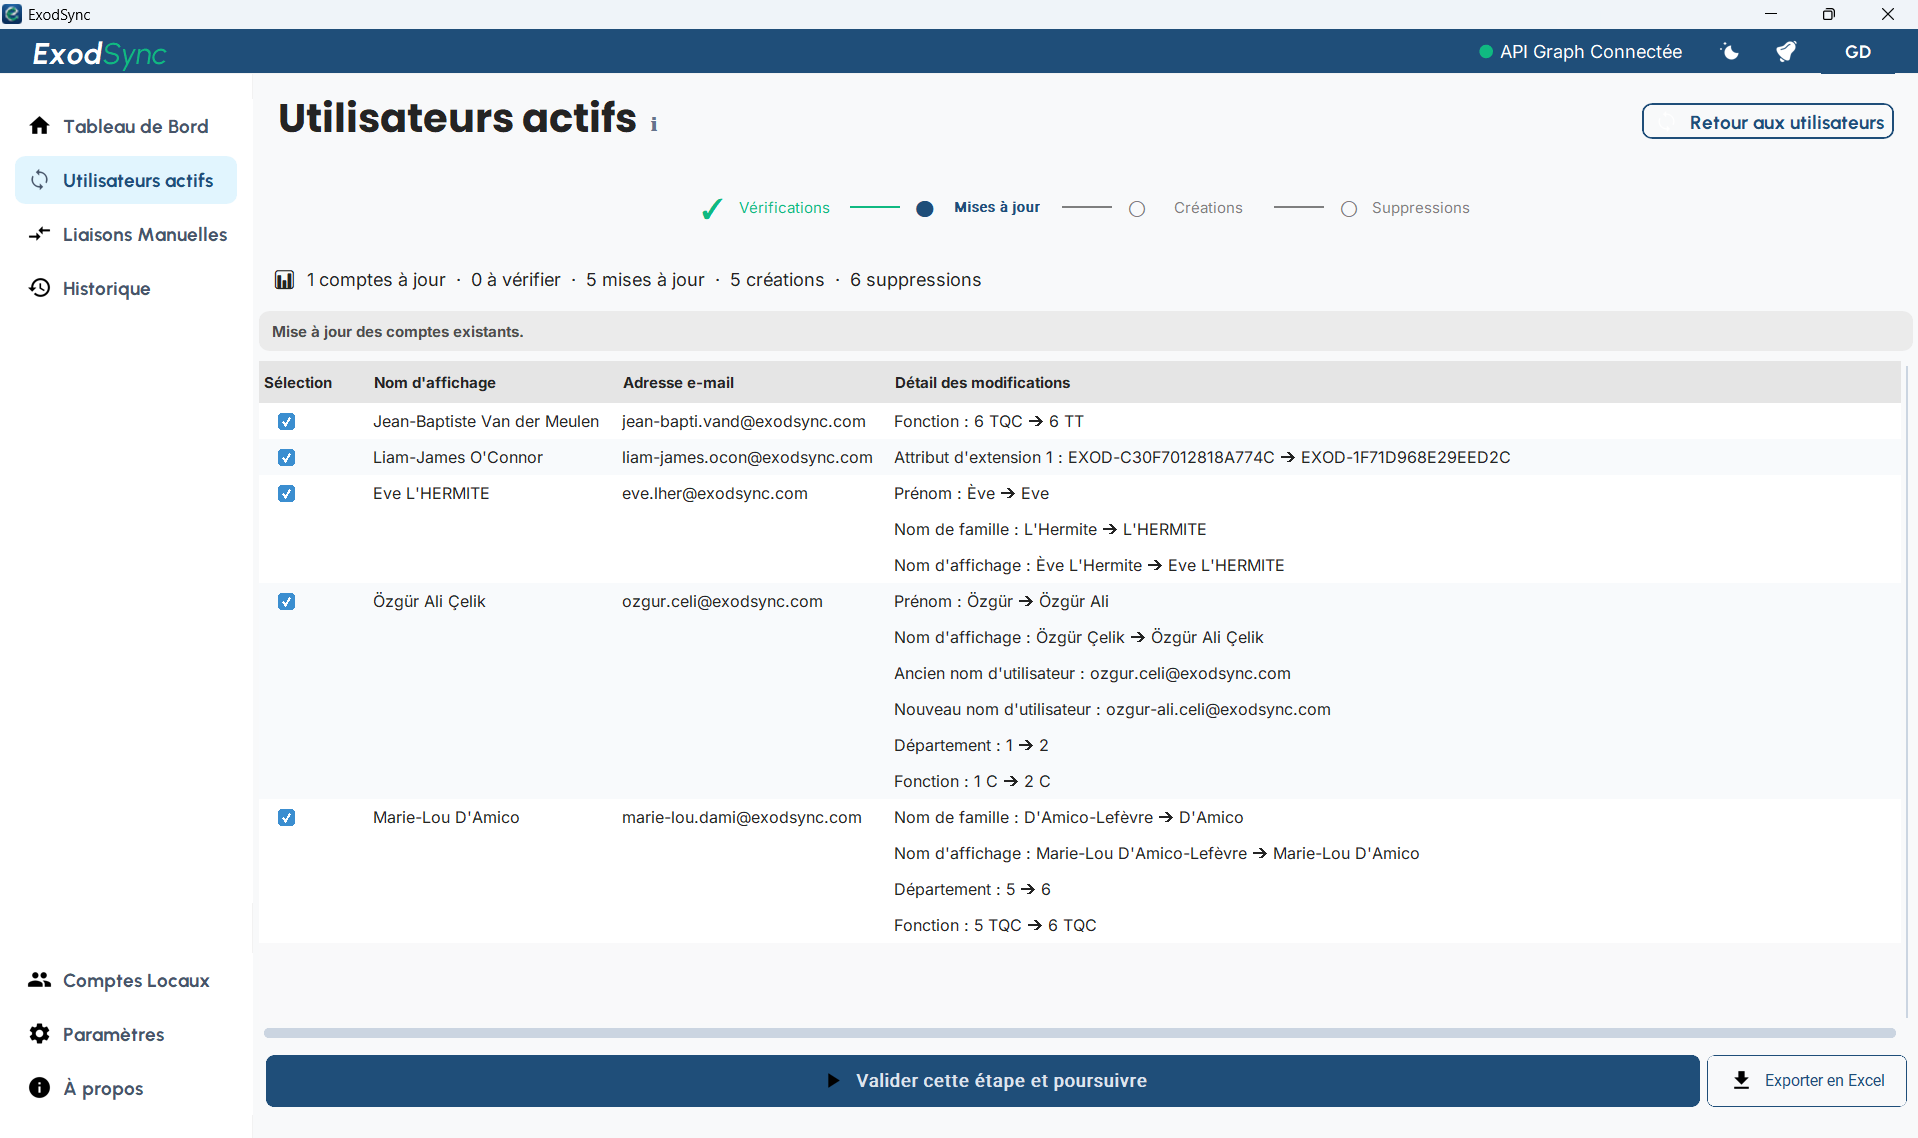
View a clear, color-coded summary of planned creations, updates, and deletions before any modifications are made. Nothing is sent to Microsoft without your control and final validation.
Success!
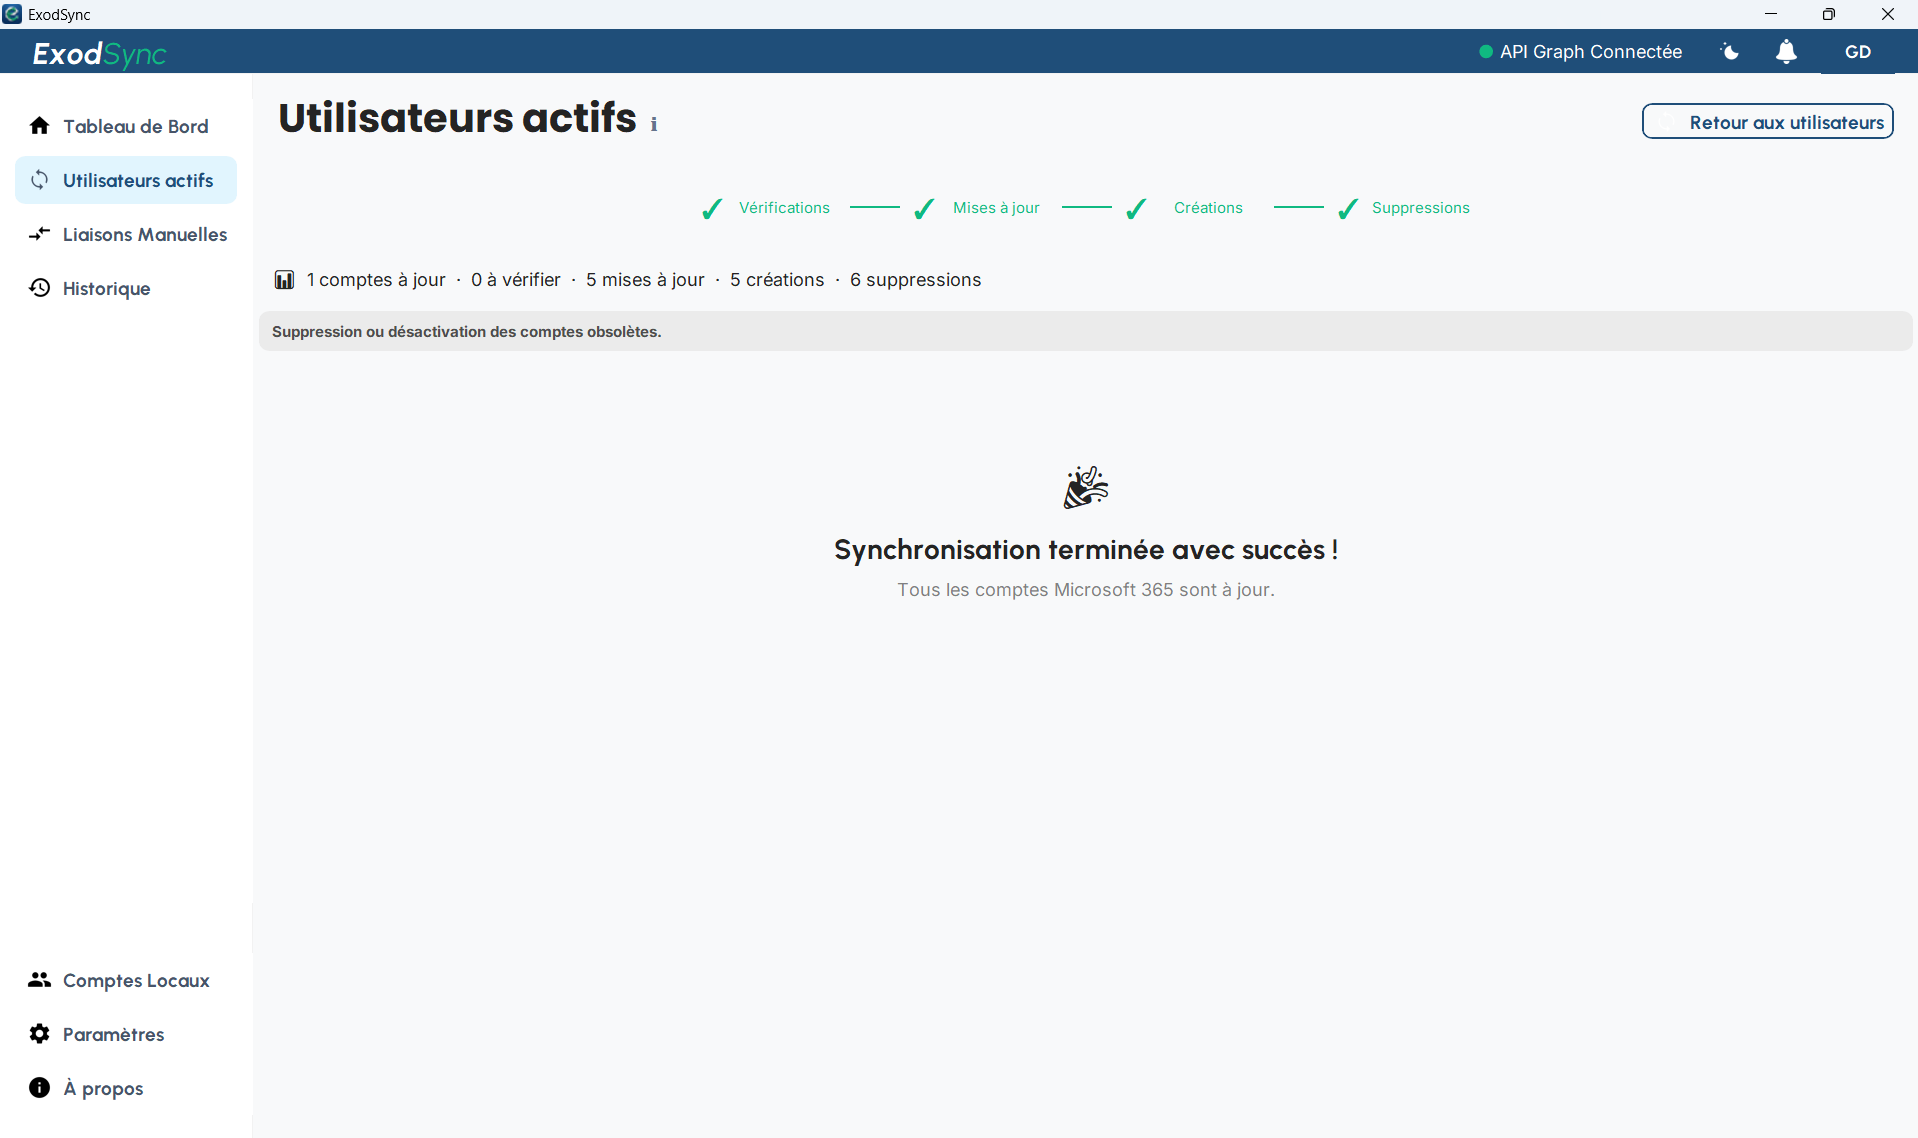
Once the modifications are validated, the tool deploys the accounts and confirms the successful synchronization. A log file is generated for your traceability.
Automatic Updates (Zero-Script Auto-Update)
ExodSync integrates an invisible and autonomous update mechanism. At each launch, the application silently queries the GitHub servers in the background to check for a new version.
- Zero Interruption: The new version is downloaded in the background without blocking your work.
- Hot-Swap: Upon restarting the application, the old executable is automatically replaced by the new one via a secure swap script.
- Data Security: Your settings, logs, and cache data are preserved during the update, as they are stored safely in your system's
AppDatafolder.